Alright, I debated what to share first as far as the clothing I made for myself recently and in the end, I just had to start with the most exciting thing. So things may seem a bit boring after this, but I can't help myself, I am practically bursting. What could be so exciting I would be bursting, you ask? My friends, I have made a leather jacket!
Just take a minute and let that sink in. If you are thinking I must be crazy, you are probably right. It started when my mom thrifted me a leather jacket that I had intended to use for bag accents, something I have wanted to try for quite a while. The jacket was hanging around and waiting for me to get it cut up and usable, and as I kept walking by and looking at it and thinking about how nice the leather was and how much I would like to wear it. Keep in mind I had never sewn with leather at all at this point. Yep, I'm nuts! For reference, here is the jacket, a men's XL.
My main problem was a pattern but as I was perusing my pin boards (I knew I collected all that stuff for a reason!) I came across the perfect pattern! The cookie zipper blouson by waffle patterns. I was a bit concerned about whether I could get all the pieced I needed out of the jacket but in the end, I bought it to see since it was on my wish list anyway and let's be honest, I was going to buy it eventually. I figured out that I could {just barely} get all that I needed out of it, with only a few odd seams and such to work around. For the knit I used an old shirt I haven't worn in ages, and I decided to use their tutorial to add a lining which is made from an old sheet. I didn't have enough leather for the facing inside but I did have some old brown corduroy pants of the husbands that were perfect. What I am saying is, I made it work.
The sleeves are a bit shorter than they were supposed to be since the original jacket had snaps on the end of the sleeves that I needed to cut off, and the back yoke has a weird seam, but overall, it worked out better than I could have imagined. The leather was light and smooth and pretty easy to sew with. I used a leather needle and my walking foot and a bunch of clover clips since no pins allowed, and things went really well. I had one place on the shoulder where the seam started to rip and I'm not sure why, but I glued it down and reinforced it and it will hopefully be fine. I will say that gathering the leather was a bit of a beast and I had a heck of a time figuring out that lining tutorial, but it all came together. The only thing my machine didn't like was the top stitching at the end, around the zipper especially since there are so many layers. I definitely have some areas of skipped stitches, but I decided I am okay with it and no one will notice but me. Also, I was quite happy that I didn't have to make pockets since there were some there already, and while they may not be ideally placed, they are super functional and I was glad to be able to skip that step. I reused the zipper too even though it was a bit shorter than I needed.
I finished it days ago now and I am still amazed that I made a leather jacket. I would guess that eventually I will make this pattern again, maybe out of sweatshirt material and perhaps without a lining. Or maybe out of knit....oh the possibilities! For now though, I am just going to be proud of this :) With that said, next week I'll show of some of the much more boring everyday clothes.
Showing posts with label redo. Show all posts
Friday, March 6, 2015
Friday, February 15, 2013
Once upon a time...
Like, two days ago, I had this dream that I would have a completed pillow to show today. Then life happened. And instead we made a fresh strawberry cake with cream cheese icing for Valentines day. And yes, it did indeed take all day (little helpers will do that to a project) but it was pretty freaking amazing. It is surprisingly difficult to find a recipe for strawberry cake that does not use either boxed cake mix or strawberry jello, but this one came out really delicious. In any case, that is what I spent yesterday doing instead of working on the pillow. Oh and then I went a bit crazy with the quilting.....
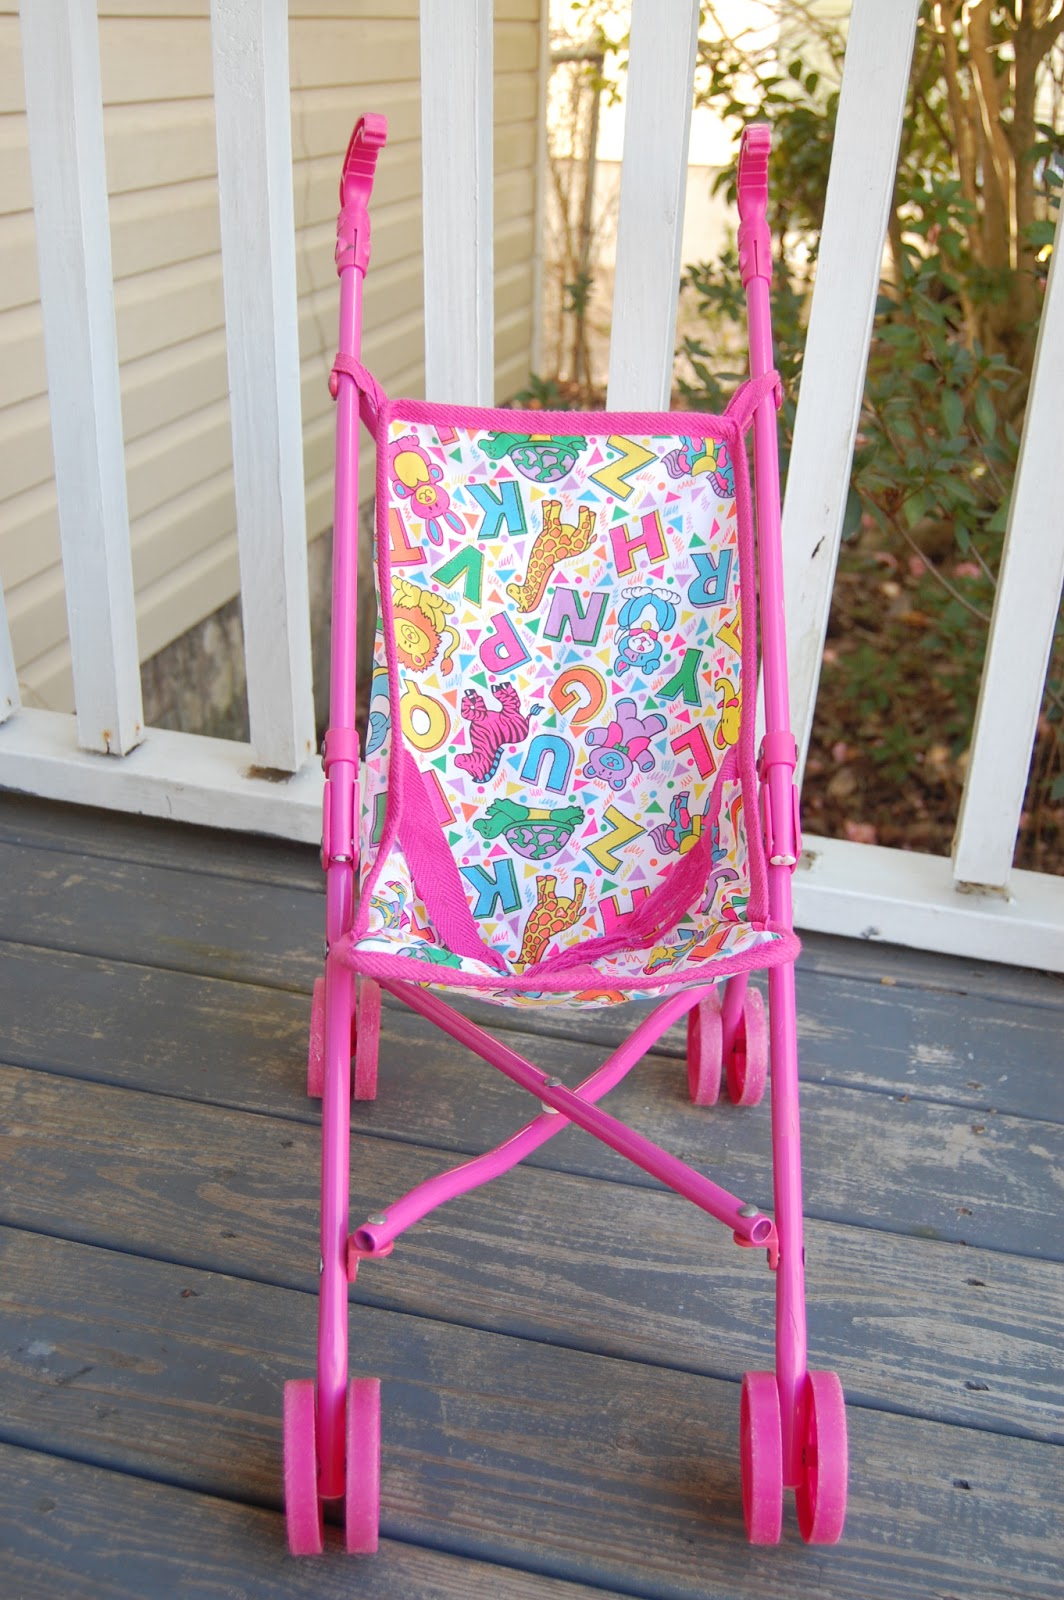
Anyway, I thought I would show the before and after pictures of the doll stroller that I redid the other day. It is kinda hard to see, but the old one had one strap that was completely frayed and useless and my little love brought it to me pretty upset about it. I had been meaning to get around to making a new one anyway, because let's face it, that thing was ugly, and this was the push I needed. It really only took an hour or so to do. Here is the before:
As a side note, do you ever look at things like this and just realize in amazement how terribly made they really are?? Because seriously I looked at the stitching on the original seat and laughed. And then was horrified because it was just so bad. Thankfully my mother-in-law found it at a yard sale for $1 so I didn't feel too bad.
The little one picked out the fabric that I used and then I found the twill tape on a roll at Joanns and I love the color. It doesn't really go with the pig fabric, but that's what she wanted and I really love that teal. Technically it is only 3/4" instead of the 1" original, but it works. To make it, I just traced the other pieces and cut them out. I didn't even have to worry about seam allowance since I was tracing a bound edge. I did end up cutting the two pieces apart to see if the top piece was curved (it wasn't...come to think of it, it wasn't even straight....) but I should have just gone for it. I was being cautious since I only had a fat quarter to work with. It took a bit of finagling, and there is an extra seam there on the front under the binding, but I made it work. Here is the after:
It came together wonderfully and it was great to have such a quick finish after working on that weekender for so long. Now maybe today I can finish this stinking floor pillow. I can hope anyway! Have a good weekend!
Anyway, I thought I would show the before and after pictures of the doll stroller that I redid the other day. It is kinda hard to see, but the old one had one strap that was completely frayed and useless and my little love brought it to me pretty upset about it. I had been meaning to get around to making a new one anyway, because let's face it, that thing was ugly, and this was the push I needed. It really only took an hour or so to do. Here is the before:
As a side note, do you ever look at things like this and just realize in amazement how terribly made they really are?? Because seriously I looked at the stitching on the original seat and laughed. And then was horrified because it was just so bad. Thankfully my mother-in-law found it at a yard sale for $1 so I didn't feel too bad.
The little one picked out the fabric that I used and then I found the twill tape on a roll at Joanns and I love the color. It doesn't really go with the pig fabric, but that's what she wanted and I really love that teal. Technically it is only 3/4" instead of the 1" original, but it works. To make it, I just traced the other pieces and cut them out. I didn't even have to worry about seam allowance since I was tracing a bound edge. I did end up cutting the two pieces apart to see if the top piece was curved (it wasn't...come to think of it, it wasn't even straight....) but I should have just gone for it. I was being cautious since I only had a fat quarter to work with. It took a bit of finagling, and there is an extra seam there on the front under the binding, but I made it work. Here is the after:
It came together wonderfully and it was great to have such a quick finish after working on that weekender for so long. Now maybe today I can finish this stinking floor pillow. I can hope anyway! Have a good weekend!
Subscribe to:
Posts (Atom)